How to Change and Replace a Pool Pump Capacitor: Step-by-Step Guide
If you notice your pool pump making a faint humming or buzzing sound, don’t panic! This doesn’t mean you necessarily need a new pump. Sometimes, you just need to replace the pump’s capacitor.
Changing the capacitor is a fairly easy task, but it is electrical work. If you are at all uncomfortable, hire out a professional.
What You’ll Need
You only need a couple of tools in addition to the capacitor:
- Insulated screwdriver
- Needle-nose pliers
- Replacement capacitor (recommended an exact exchange)
- Multimeter (optional for testing)
1. Turn Off the Power
Go to your main circuit breaker and flip the switch for the pool pump to the off position. Simply turning off the pump and its timer is not enough. The breaker must be off.
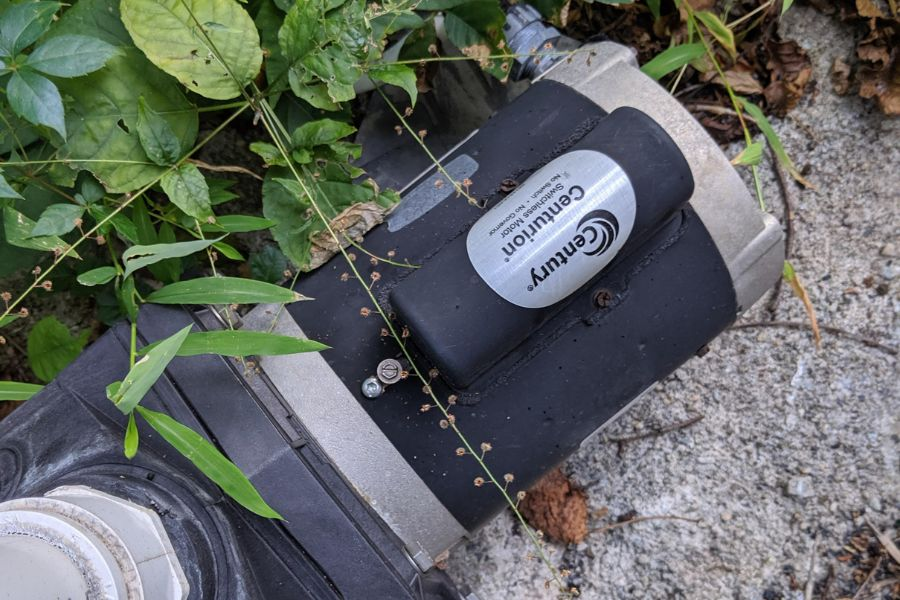
2. Locate and Access the Capacitor
Most pool pumps have one of two setups:
- Hump/Top Mount: The capacitor is under a metal or plastic “hump” on top of the motor.
- Rear Mount: The capacitor is behind the circular cover at the very back of the motor.
Some pumps will have two capacitors, a run and a start. Check your manual to see where and how many your pump has.
Use your screwdriver to remove the screws holding the covers in place to locate the capacitor.
3. Discharge the Old Capacitor
This is the most critical safety step. Even with the power off, a capacitor can hold a painful (and dangerous) charge.
Take your insulated screwdriver and touch the metal blade across the two terminals of the capacitor simultaneously. You may see a spark or hear a “pop”. This is completely normal and means the stored energy has been neutralized.
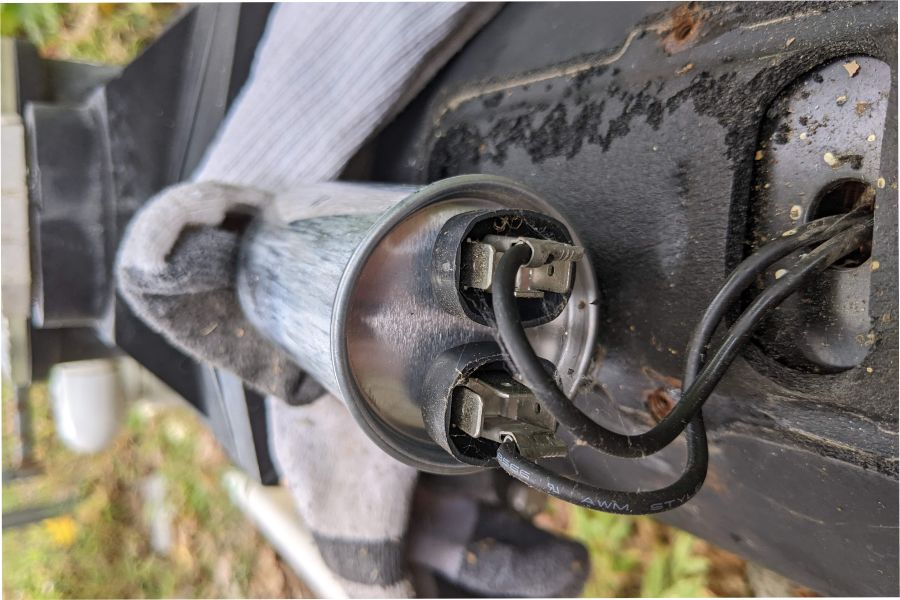
4. Disconnect the Wires
Before pulling any wires, take a photo of the connections so you have a diagram.
Use the pliers to gently pull the wire connectors off the terminals. If your pump has a start and run capacitor, make sure you don’t mix up their specific wires.
5. Replace with the New Capacitor
When getting a new capacitor, you need to make sure you get the right specifications for your pump. An exact replacement is ideal, but if that isn’t possible, it still needs to be compatible.
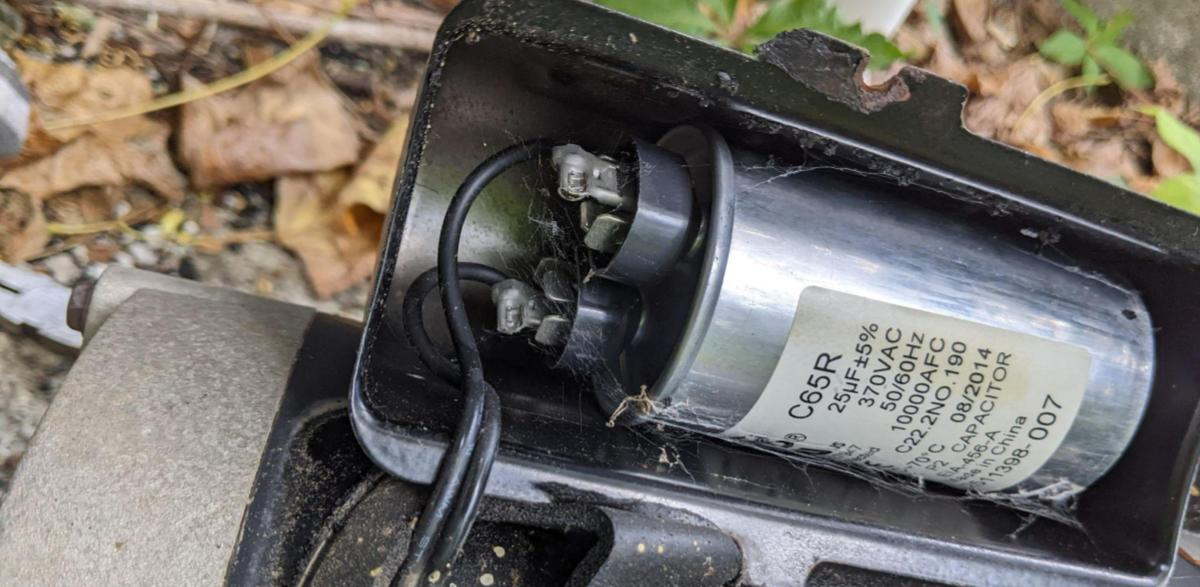
- Microfarads (MFD): This if typically shown as MFD, µF, or uF. The replacement should be the same as the original.
- VAC (voltage): This will be the voltage rating of the capacitor.
- Dimensions: The capacitors fit in a tight space. If they aren’t the same size, you might not be able to fit it in its housing.
Note: If absolutely necessary, you can go a bit higher on MFD and VAC. Never go lower! But to keep it safe, get a capacitor with the same specs.

Before replacing, if you want to use a multimeter to verify the old capacitor is bad, feel free to do so.
To replace, take the old capacitor out of its metal bracket and insert the new on in. Use your picture and reconnect the wires to the new terminals exactly as they were on the old one.
For the most part, it shouldn’t matter which wire goes to which terminal (as long as they are on the correct capacitor), but following your photo is the safest bet.
6. Close and Test
After the new capacitor is in place, replace the cover and tighten the screws.
Turn the circuit breaker back on and start your pump. If the capacitor was the issue, the motor should start immediately like normal.
It’s Shockingly Easy!
All jokes aside, knowing how to replace the capacitor can save you hundreds, even thousands, in a pump replacement.
And as mentioned above, if you don’t feel comfortable doing it yourself, go ahead and call an electrician or a professional to make sure it’s done right.